How to Safely Open Your Lexus Key Fob (e.g., for Battery Replacement or Internal Cleaning)
Opening your Lexus key fob for tasks like battery replacement or internal cleaning requires a delicate touch to avoid damaging the internal electronics or the casing. Most Lexus key fobs can be separated by carefully prying along a seam or using a specific notch, often with a small tool. It’s important to identify your fob’s design and have the correct tools ready to ensure a smooth process without causing harm.
Prepare for the Task: Tools and Fob Identification
Before you begin, gather the necessary items and understand the type of key fob you have. This preparation is key to a successful and damage-free operation.
- Tools: You’ll need a thin, flathead screwdriver (preferably small) or a plastic pry tool. A plastic tool is recommended to minimize the risk of scratching the fob’s exterior.
- Replacement Battery: Most Lexus key fobs use a CR2032 or CR2016 lithium coin cell battery. Verify the exact type with your owner’s manual or by inspecting the old battery once the fob is open.
- Fob Type: Familiarize yourself with your specific Lexus model and year, as key fob designs can vary. Look for a visible seam running around the perimeter of the fob or a small notch, often near the emergency key release.
Step-by-Step: Separating Your Lexus Key Fob
The method for opening most Lexus key fobs involves carefully separating the two halves of the casing. While minor variations exist between models, the core principle remains consistent.
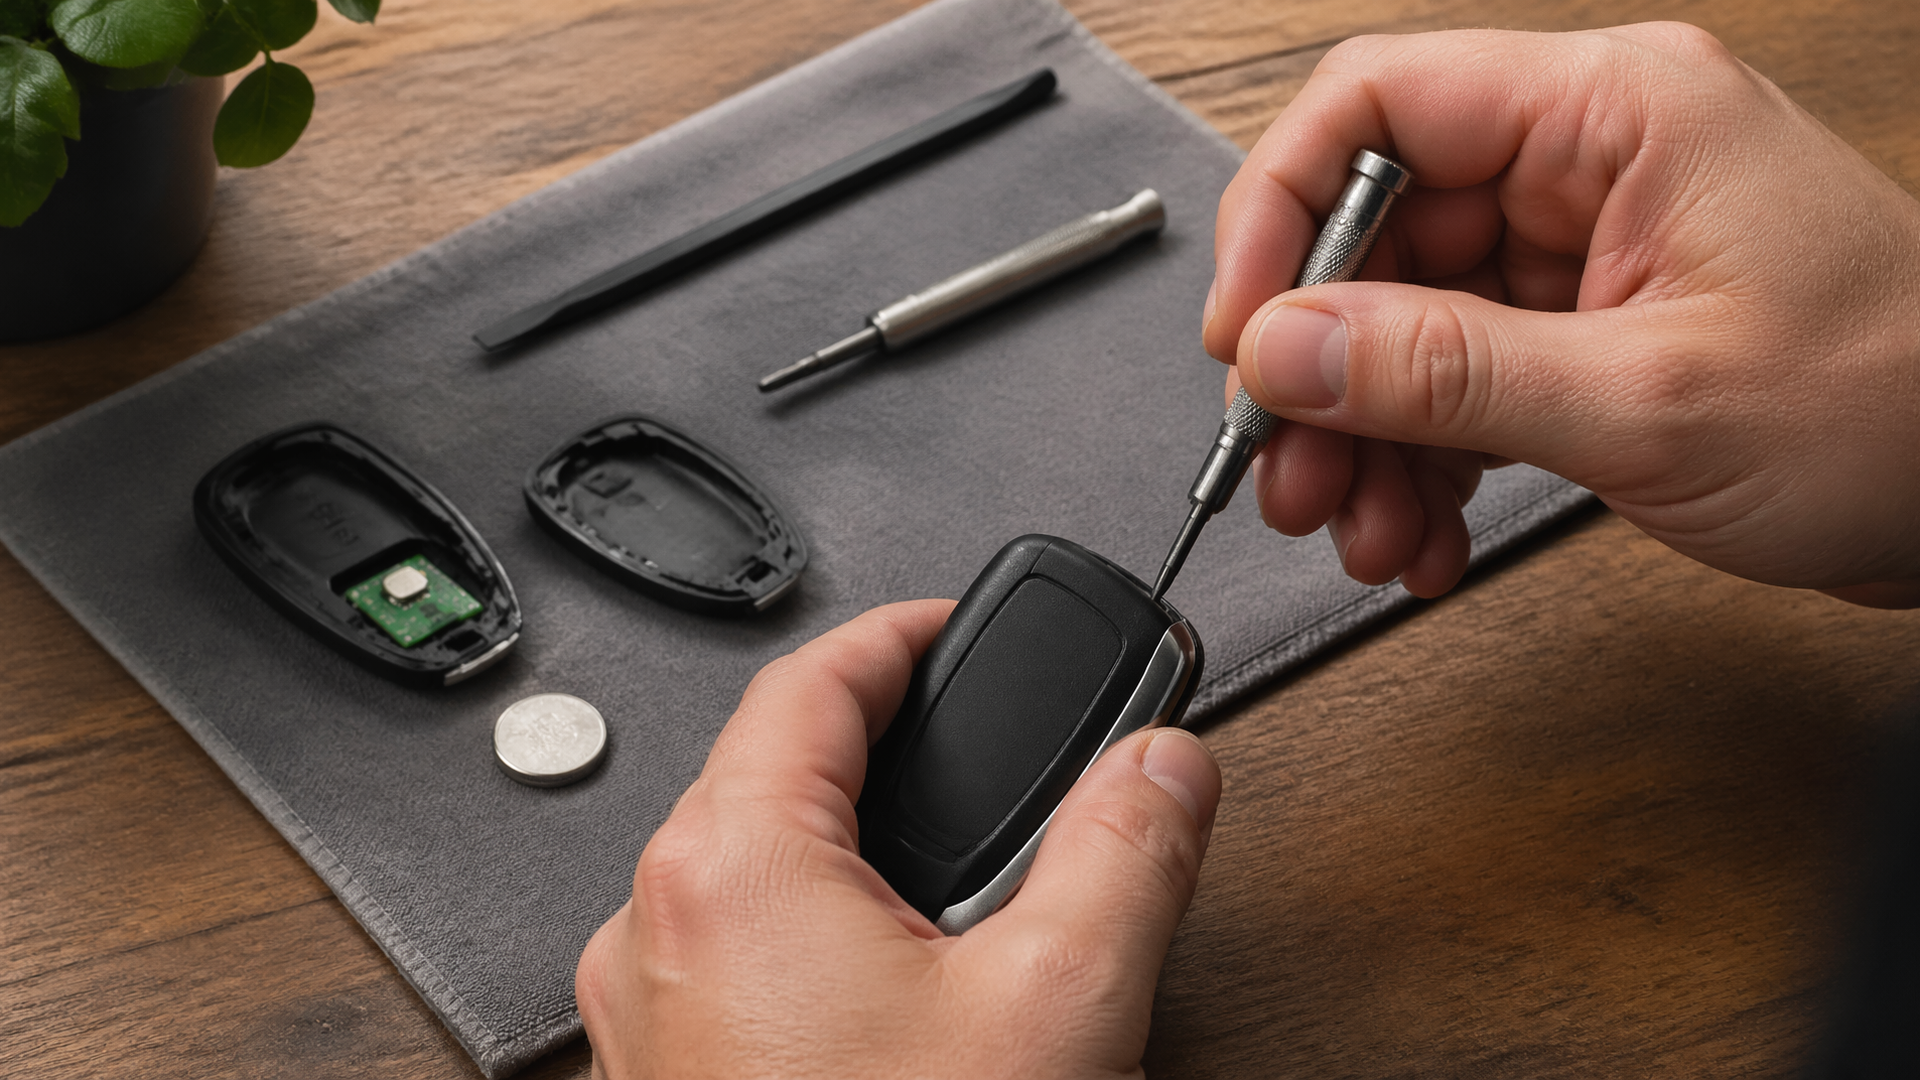
1. Locate the Separation Point: Carefully inspect your key fob. You’ll typically find a fine seam where the two plastic halves join. Some models may have a small notch or slot, often adjacent to the release for the physical key blade.
2. Insert Your Tool: Gently insert the tip of your chosen tool (flathead screwdriver or plastic pry tool) into the identified seam or notch. If using a screwdriver, apply minimal force to avoid cracking the plastic.
3. Apply Gentle Leverage: Twist the tool slightly to create a small gap between the fob’s halves. Work your way around the entire perimeter of the fob, applying steady, gentle pressure. You might hear small clicks as internal clips disengage.
4. Separate the Casing: Once you have worked around the entire seam, the two halves of the key fob should begin to separate. Be mindful that the internal circuit board and battery might shift or become loose as you open it.
Replacing the Key Fob Battery
Once the key fob is open, replacing the battery is typically a simple process.
1. Identify and Remove Old Battery: Locate the coin cell battery. Note its orientation (which side faces up) before removal. Gently pry the old battery out using your fingernail or the plastic pry tool. Avoid using metal tools that could damage the battery contacts or short-circuit the battery.
2. Install New Battery: Insert the new battery into the battery compartment, ensuring it is oriented correctly. For most fobs, the positive (+) side should face upwards, but confirm this by observing the old battery’s placement.
3. Reassemble the Fob: Carefully align the two halves of the key fob. Press them together firmly until they snap securely into place. Ensure there are no visible gaps around the seam.
Common Hurdles and How to Clear Them
If you encounter issues during this process, these common problems and their solutions might help.
- Fob Won’t Separate: Double-check that you are using the correct seam or notch. Some Lexus fobs have a hidden screw that needs to be removed first, often revealed after releasing the physical key blade. If you find a screw, you will need a very small Phillips head screwdriver.
- Difficulty Reassembling: Ensure all internal components, particularly the circuit board and battery, are seated correctly and are not obstructing the casing. A slightly misaligned wire or contact can prevent the halves from closing properly.
- Fob Stops Working: After reassembly, verify that the new battery is installed with the correct orientation and is not depleted. Confirm the circuit board is fully seated. If the fob still fails to operate your vehicle, it’s possible that damage occurred during disassembly, or there might be an unrelated issue with your vehicle’s keyless entry system.
Confirming Your Key Fob’s Functionality
After successfully reassembling your Lexus key fob, it’s crucial to test its operation to ensure everything is working as expected.
- Test Lock and Unlock: Use the buttons on the key fob to lock and unlock your vehicle.
- Test Ignition/Start: If your Lexus has a push-button start, insert the fob into the designated slot or press the start button to confirm the car recognizes it.
If your vehicle responds to the key fob commands, the battery replacement and reassembly were successful.
When to Escalate to Professional Assistance
If you’ve attempted these steps and your key fob remains non-functional, or if you feel uncomfortable proceeding with the disassembly and reassembly, it is advisable to seek assistance. Contact your local Lexus dealership or a qualified automotive locksmith. Forcing a key fob that is difficult to open can lead to permanent damage, potentially resulting in a more expensive replacement than professional service.

Greedy Wheels is the founder and lead editor at Wheels Greed. With over 15 years of hands-on automotive experience — from rebuilding engines in a home garage to managing fleet maintenance for a regional logistics company — he brings real-world mechanical knowledge to every guide.
His work has been featured in automotive forums, owner communities, and dealership training materials. When he’s not researching the latest car owner questions, you’ll find him at a local track day, wrenching on his project car, or testing the newest OBD2 diagnostic tools.
At Wheels Greed, every article is reviewed against manufacturer service manuals, NHTSA bulletins, and verified owner reports. No AI-generated fluff. No guesswork. Just practical answers from someone who has turned the wrench.